Sanding
It was a hot, dirty, hard, and annoying job, but I didn’t see any volunteers standing around to help. Perhaps that’s what I need to do: get a good fiberglass man and a few of his workers to knock this out for me!! Ultimately, I’m trying to get the underside repaired, primered and painted so that I can turn the body over and start on the side that matters most. I’m really not that far away; I just need to persevere.
I now have a profound respect for ANYONE in the fiberglass bodywork business (or boats for that matter). Saying it and doing it are two completely different things. I needed to get some brown-colored paint off of some of the wheel-well panels. I had tried using small palm-size orbital sander and I got nowhere with it. I needed some serious speed with serious grit to get this stuff off.

So I bought a cheap little Chicago Pneumatic air sander, and strapped an 80-grit disk onto this hummer. #80 was the finest grit I could find at Lowes. Knowing that I was going to be doing a lot of sanding and painting, I invested in a really nice Ingersoll-Rand upright air compressor last Christmas, so it was time to put it to work. (This compressor is about all I can handle in regards to size and weight as it has a cast-iron pump). Even though you take on this kind of work yourself to save money (and to learn), you’ve GOT to have the proper tools and equipment otherwise you’re just spinning your wheels.
So I start using this little sander, but it bogs down fairly easily; not much power to it. But man does it throw the dust!! The dust got so bad in the shed that I had to pull the Venus out into the open. Of course, I use a full-face air mask. After finishing one side, I tried the angle-grinder with a 120-grit flap wheel on it. This did a much better job, had power, and didn’t gouge like the little air sander did. So using the angle grinder, I finished both rear inner sides of the panels.

One of the other tool investments was an in-line body sander (two-piston) made by Ingersoll-Rand. I tried it on a rear section of the body, and it did a beautiful job of taking off old primer without loading up the sandpaper…and the results were very flat. I can tell this tool will be very useful in keeping the bodywork straight. In the second photo you can see where the original glass is just starting to show through…this is where I will stop.


Glass Work
Having had enough sanding for one day, I pushed the body back inside to do some glass /resin work. For a few weeks now, I had been coming out to lay in some glass and then letting it cure overnight. I’ve been buying my fiberglass supplies from an outfit called Fibre Glast. There are specific instructions for the resin: 13 drops of hardener per once ounce of resin. I use a small digital postal scale which is perfect for weighing the exact amount of resin. After adding the hardener, I only have about 15-18 minutes before it starts to set up, so you have to work fast, and in small batches. I generally mix about 6 ozs. of resin at a time. I always clean the area first with acetone, sand if necessary, and then pre-cut any glass I’m going to lay down. I realize that there will be fiberglass experts yelling at me by the end of this post, but I’m doing this the best way I know how in the shortest amount of time. I am fully aware that holes are supposed to be tapered outward and that you lay down successive layers of glass to create a bond that uses as much surface area as possible. However, the proximity of the holes in the instrument panel just won’t allow for that. And besides, this is really more of a cosmetic fill than it is a strength issue.
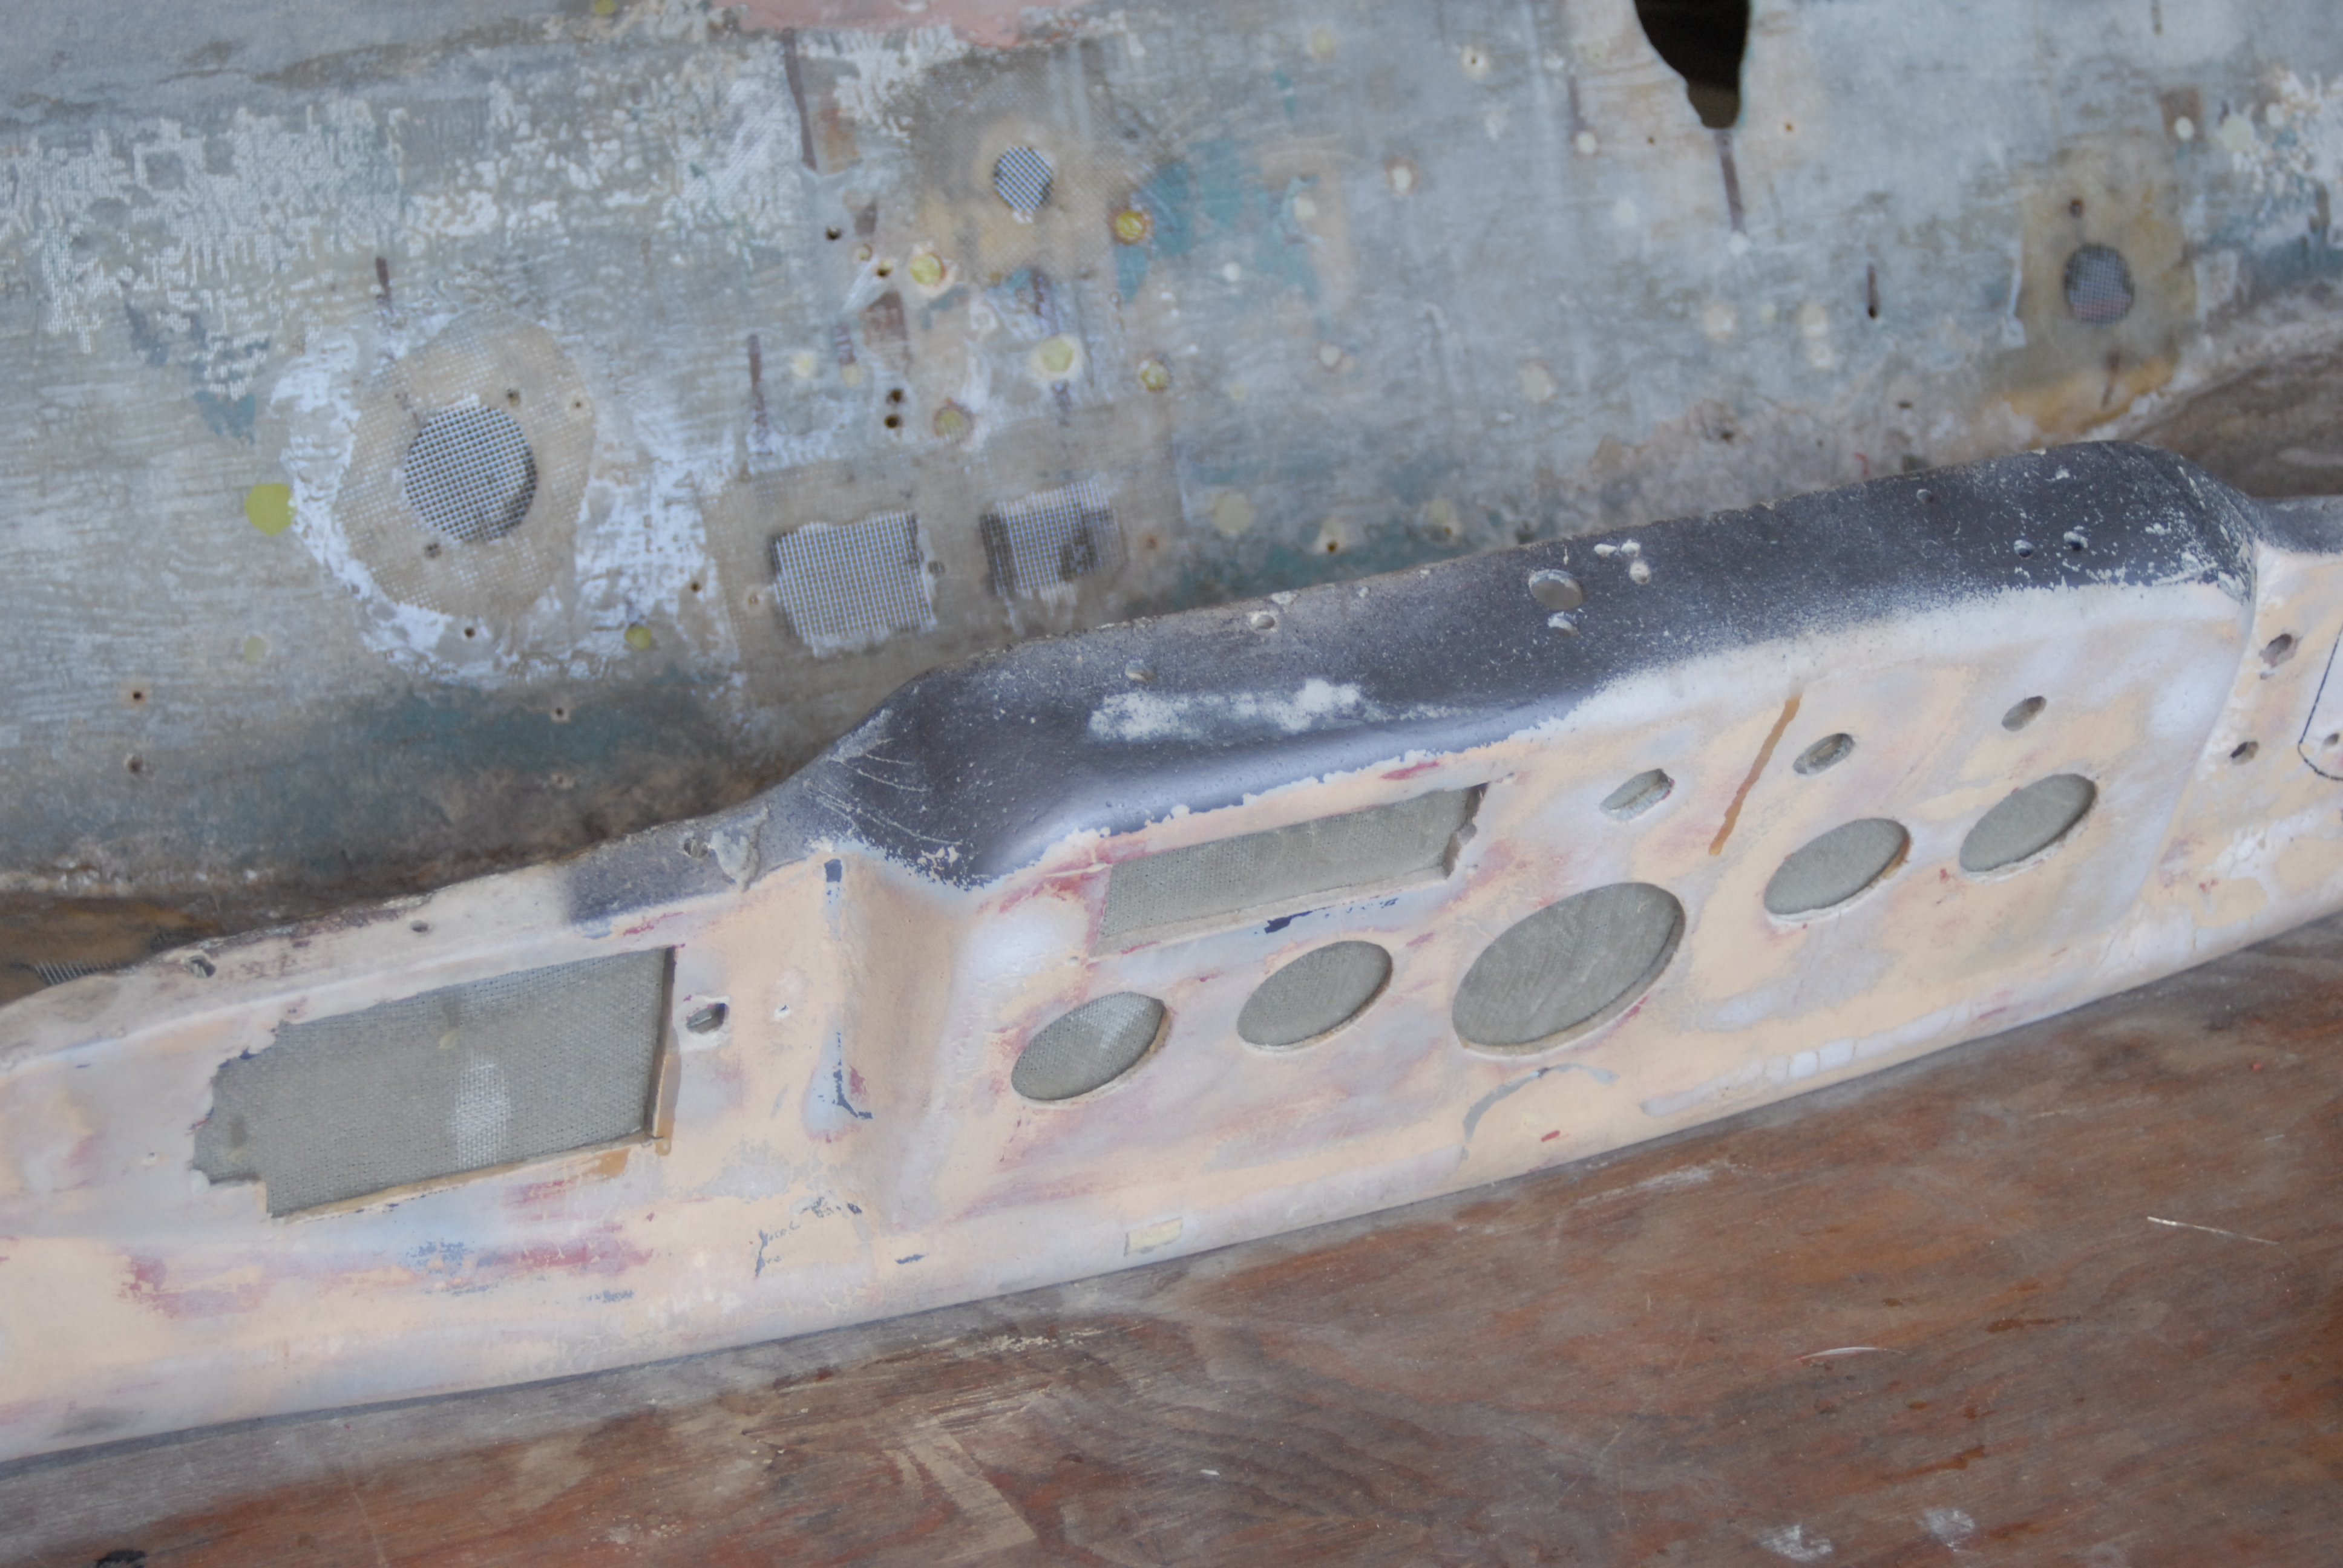
As you can see below, I’ve placed a sheet of glass behind the instrument panel, and behind the large opening in the tailight sections. Although I think I am suppose to be filling from the back, there simply isn’t any room to work to do that. So, for these areas, I will feather out the holes and fill with mat from the front, which is more of a loose, choppy kind of fiberglass than the typical woven sheet that most are familiar with.


Did you notice what a careful job a previous owner did when cutting the hole for the tail light? Just because its fiberglass doesn’t mean you can butcher it. Jeez!
Keep in mind that the body is upside down, and I’m taking advantage of the accessability of these areas. Working on your back in a tight overhead area with sticky resin is not my idea of a good time.
Below is a photo of the driveshaft tunnel before repair. These areas were cut out to allow for a floor shifter and linkage. Since I am going back to a column shift, these sections need to be filled in. There is nothing in the tunnel that requires access from the top, such as a gearbox, so these areas need to be completetly filled.

Below, I started by laying a piece of scrim over these sections. (This scrim is identical to the stuff you put on a seam when you float sheetrock). This scrim follows the contour of the tunnel and provides support to keep the glass fabric from sagging in the middle. After overnight curing, this was followed by a layer of 10 oz. glass fabric. Remember, we’re looking at the very bottom side of the floor…more filling will occur when the body is flipped rightside up. For small holes and the like, I’m using a product that incorporates Kevlar as its filler material….supposed to be very strong…but’s an ugly bright green in color. Fifty years from now, someone will be re-painting this body (hopefully) and will wonder just what the heck this green stuff is!

On the firewall (below), another piece of scrim followed by glass fabric. Once this cured, I marked and cut the contour of the tunnel, and followed this with 1″ strips of mat to bridge the span between the two areas. I will continue to fill and reinforce until satisfied with the shape and amount of glass. This floor is only about 1/8th to 3/16th’s inch thick, so it won’t take much when I fill from the top. This bottom section will probably get a final finishing layer of glass fabric from one side to the other.


Ultimately, at least for now, I plan on covering the entire engine-side of the firewall with 1/8″ polished aluminum, so cosmetics are not all that critical here. Once I get all of the reapirs and sanding done, I’ll bring out a power washer and thoroughly clean the entire bottom side before spraying the primer and paint. I had done this once before while in my driveway, but it looks like I missed a few spots.
Hopefully, my next update will show the finished underside. Thanks for checking in!

Looking good Pat. I tried to subscribe, but had problems, so I’ll just keep checking back.
Wow. That tail light opening cracks me up. Maybe a sabre saw… using one hand?
I shouldn’t complain so much about my own polishing work. I last used Bondo on a Volvo 544 as a teenager. After that I swore I’d never do fiberglass work again!
It does make you wonder just what the pros use to accomplish the task in the least amount of time but with some degree of control. Or do they just sand overly coarse and level the ripples later?
I’ve got a couple of C.P. air tools from Harbor Freight and they do seem to work well enough. I know I’ve given their 3″ cut-off tool and small die grinder serious workouts.
I’m sure you already noticed this but sandpaper is expensive! I normally use it dry but I’m wondering if I could get better life if I wet-sanded. I know some other types of grit, like 3M Trizact, last longer but I can’t find that at the local hardware shops.
Clearly a work of love and respect for your dad.
A wonderul undertaking
2/23/09 Patrick, You have done a magnificent job in restoring Venus. I never realized how fiberglass could “come apart’ and “flake away” until I watched your excellent videos. Man, that is a labor of love and you have the patience of a toothache for hanging in there and making the rebirth of Venus happen. I think it’s a great tribute to your dad and that right now he is smiling and saying,
‘Don’t let the itch of fiberglass stop you now, son. Keep going.” When you are all done make sure you have a copper or stainless memorial plate laminated into some part of the body for posterity. Well done. jim
Patrick –
Wow, what a lot of work! I didn’t realize the Venus had an Offenhauser engine. How difficult was it restoring a vintage engine? The car looks great, can’t wait to see the finished project.
No, the engine is just a plain old ’51 Merc flathead V8. Back in the 50’s, folks like Offenhauser and Edlebrook offered “finned” cast-aluminum heads for flatheads. They are still offered today, and that’s what you see in the close-up. I am also using a polished Offy intake manifold designed for a dual-carb setup.
Thanks for posting a response!